Create documentation or application support tickets with Microsoft Recorder
Have you ever needed to create documentation that shows someone else how to use an application or website within your organization? Or, have tried to explain to a Technical Support person within your organization about a problem you are running into with an application or website. Well Microsoft Recorder can help you create very detail explanation documents in both cases that can include screenshots with step by step instructions or details about the problem you are facing.
You can use the Microsoft "Problem Steps Recorder" to automatically capture the steps you take on a computer, including a text description of where you clicked and a picture of the screen during each click (called a screenshot). Once you capture these steps, you can save them to a file that can be used by a support professional or someone else helping you with a computer problem. To start the "Problem Steps Recorder" click on the Windows Start button and then type in "recorder". You should see a menu option for "Problem Steps Recorder".
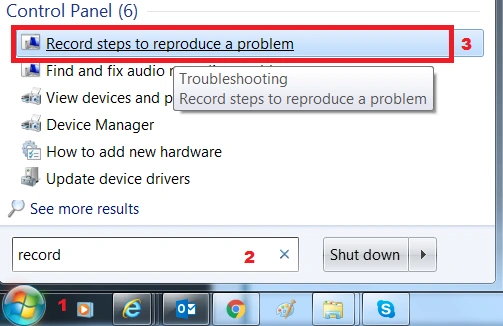
Microsoft Recorder Windows Start Button Menu
Documentation and Problem Recording
Do not let the name fool you. The Microsoft "Problem Steps Recorder" is also very good for creating documentation about an application that you use in your organization within your administrative capacity. For example, you could document how to use the Word Templates for doing Executive correspondence. Or how to use the employee performance review application that everyone has to eventually use. There are many great ways you can use the Microsoft "Problem Steps Recorder" to capture screenshots of an application or online process and then add detailed comments to the document in order to provide step by step instructors or provide details about when a particular software application problem arises so that you can better explain it to the Technical Support people.
Once you click on the "Record steps to reproduce a problem" menu item you will see a small floating window appear on your desktop.

Microsoft Recorder Initial Screen
One thing to note is that when you record steps on your computer the words you type in from the keyboard will not be recorded in the final output; that you will need to add later including possibly adding them into the print screenshots. You can, however, use the comment feature described below to highlight where the problem is occurring or the application feature you want to highlight. Some programs that use full-screen high-resolution graphics like games might not be captured accurately or might not provide useful details to a support professional or quality images for your documentation.
To record and save steps on your computer
- Click to open Problem Steps Recorder.
- Click Start Record. On your computer, go through the steps on your computer to reproduce the problem. You can pause the recording at any time, and then resume it later.
- Click Stop Record.
- In the Save as dialog box, type a name for the file, and then click Save (the file is saved with the .zip file name extension).
Overview of the Recording Process
Essentially, once you have started the "Problem Steps Recorder" application, you click on Start Record and then switch to your software application or website and start clicking on the areas you want to document the process and steps for using it. You keep walking through the process you are trying to record for demonstration. Each time you click a print screenshot will be recorded and stored in a file. To view the record of the steps you recorded, open the .zip file you just saved, and then double-click the file. The document will open in your browser.

Problem Step Recorder Recording ZIP File
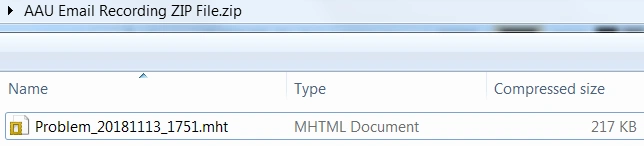
Problem Step Recorder Recording ZIP File MHTML
Copy the MHTML file out of the folder to another location and then open in Microsoft Word. When you open up the MHTML recording file in Microsoft Word you will be able to edit it and add steps and details about the information you want to convey to the audience. You can even add more screenshots if you like.
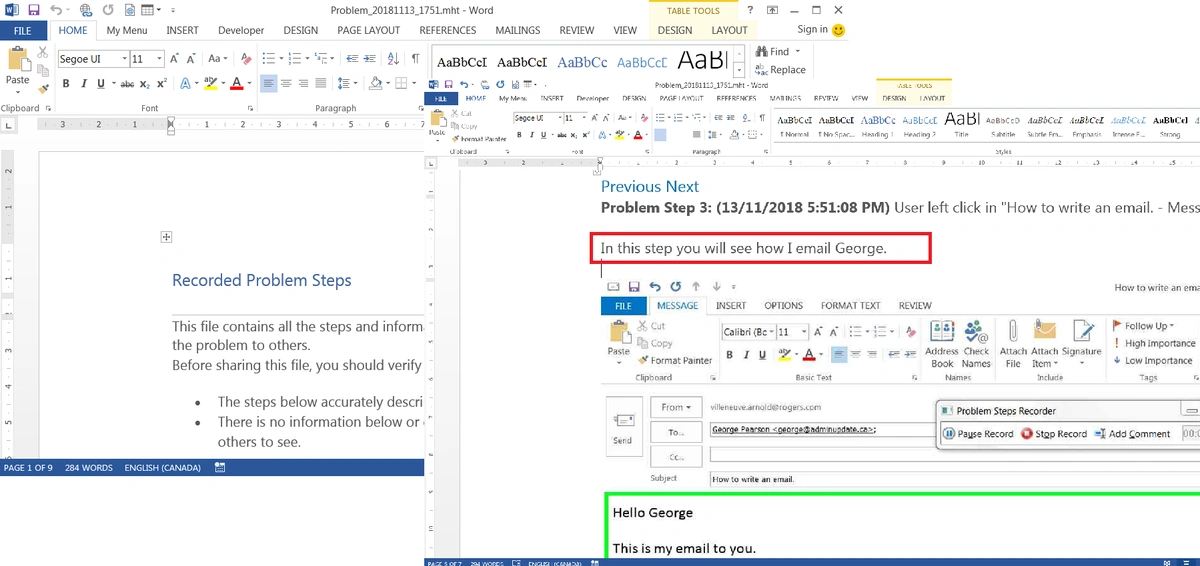
Email Recording ZIP File MHTML editing in Microsoft Word
So now you know how to use a very simple Microsoft tool to create step-by-step documentation, instructors, or software problem ticket files that really convey the message you want to get across to the reader.
All the best on the documentation trail!
Related Training: